This TubeBay tutorial shows WooCommerce store owners how to set up TubeBay step by step. It also shows how product videos can make product pages more engaging.
That is where TubeBay helps.
TubeBay is a YouTube video plugin for WooCommerce. It connects your YouTube channel to your WooCommerce store and lets you assign YouTube videos to products from inside your WordPress dashboard. You do not need to copy embed codes by hand.
In this TubeBay tutorial, you will learn how to set up TubeBay step by step. You will also see how to use it as a practical WooCommerce product video plugin.
What Is TubeBay in This TubeBay Tutorial?
TubeBay is a WordPress and WooCommerce plugin built for store owners who want to add YouTube videos to WooCommerce product pages.
It helps you:
- connect your YouTube channel to WordPress
- sync your video library
- assign videos to WooCommerce products
- show videos inside the product gallery
- improve performance with a lightweight video preview
Instead of loading a heavy YouTube embed on page load, TubeBay uses a video facade. Visitors first see a thumbnail and play button. The full player loads only when they click.
That helps keep product pages faster and cleaner.
In short, TubeBay makes WooCommerce product video setup much easier. That is a key reason this TubeBay tutorial is useful for store owners.
Why Use a YouTube Video Plugin for WooCommerce?
Product pages often depend too much on static images.
That can be limiting when shoppers want to see a product in action.
TubeBay helps WooCommerce store owners use YouTube product videos in a cleaner way. Instead of managing video embeds manually, you can connect your channel, sync your library, and assign the right video to the right product.
This makes TubeBay useful for stores that want:
- better product presentation
- more engaging WooCommerce product pages
- simpler YouTube video management
- stronger trust before purchase
- better page speed than standard embeds
As a result, shoppers get a better product experience.
TubeBay Tutorial Comparison: Manual Embeds vs TubeBay
| Setup Method | What It Looks Like |
|---|---|
| Manual YouTube embed | Copy paste work, slower page load, harder product-level management |
| TubeBay WooCommerce video setup | Connected channel, synced library, easier product assignment, lightweight video preview |
So if you want a cleaner workflow, TubeBay is the better fit.
Who Should Use TubeBay?
TubeBay is a strong fit for:
- WooCommerce store owners
- brands that already publish product videos on YouTube
- marketers who want more engaging product pages
- teams that want a simpler way to manage product videos
If you use video to explain products, show demos, or build trust, TubeBay can make that process much easier.

For most WooCommerce brands, that means less manual work and better product pages.
What You Need Before Setup
Before you start, make sure you have:
- a WordPress website
- WooCommerce installed and active
- TubeBay installed on your site
- a YouTube channel with videos you want to use
TubeBay supports WordPress 6.8+ and PHP 7.4+.
Once you have these basics ready, you can start the TubeBay setup process.
TubeBay Tutorial Setup Overview
Before we go step by step, here is the full TubeBay setup flow:
- Install and activate TubeBay
- Connect your YouTube channel
- Complete onboarding
- Sync your YouTube video library
- Open a WooCommerce product
- Assign a product video
- Choose video placement
- Review playback settings
- Preview the frontend
- Use the shortcode when needed
TubeBay Tutorial Callout: Best Connection Option
Google OAuth 2.0 is the recommended setup method.
It is smoother, safer, and easier for most WooCommerce store owners.
In most cases, this is the best way to set up TubeBay.
Step 1: Install and Activate TubeBay
First, download and install the TubeBay plugin on your WordPress site.
Once the plugin is installed, activate it from your WordPress admin area.
After activation, TubeBay will be ready for onboarding and connection setup.
This is the first part of the TubeBay tutorial.
Step 2: Connect Your YouTube Channel
TubeBay offers two connection methods:
- Google OAuth 2.0
- manual API key
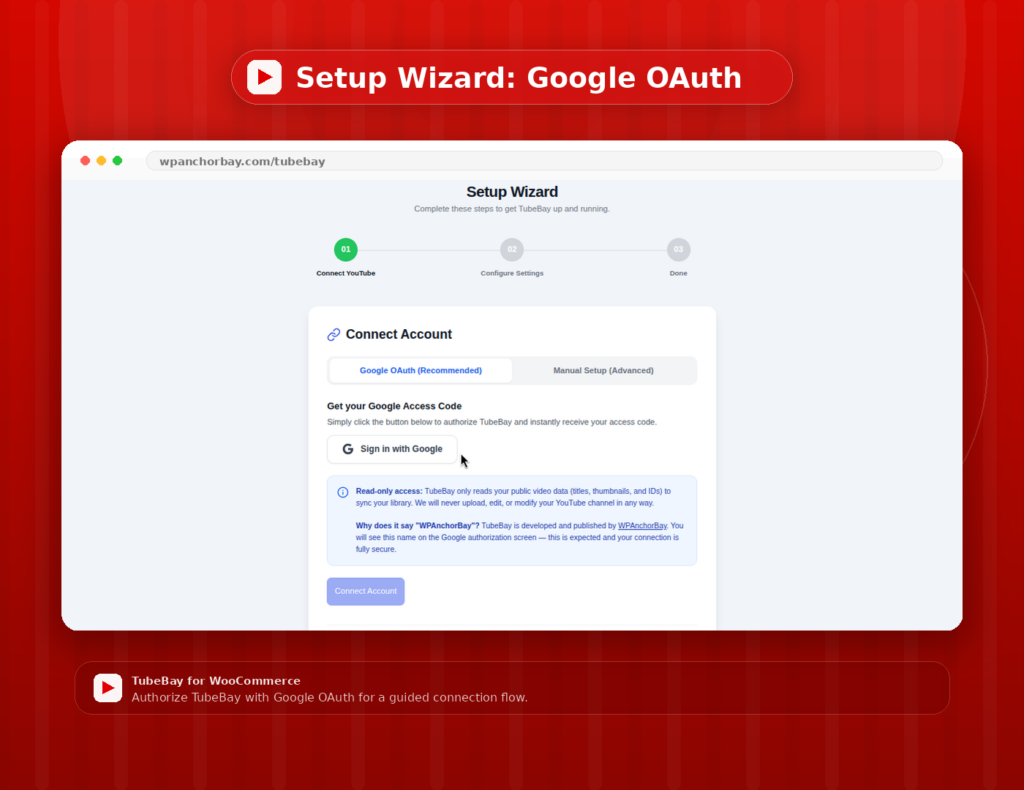
Google OAuth 2.0 is the recommended option. It gives you a smoother and more secure setup process.
After you connect your account, TubeBay can access your YouTube video library and prepare it for syncing.
At this stage, TubeBay starts working like a real YouTube sync plugin for WooCommerce.
TubeBay Tutorial Callout: What This Step Solves
Without a proper connection, WooCommerce product videos become manual work.
This step turns TubeBay into a connected YouTube sync plugin for WooCommerce.
Step 3: Complete the Onboarding Flow
TubeBay includes a guided onboarding wizard.
Use it to move through the core setup stages. This helps you connect your channel, review the plugin setup, and prepare your store for product video use.
If you are new to video-based product merchandising, this step keeps the process simple.
Because of that, the setup feels easier from the start.
Step 4: Sync Your YouTube Video Library
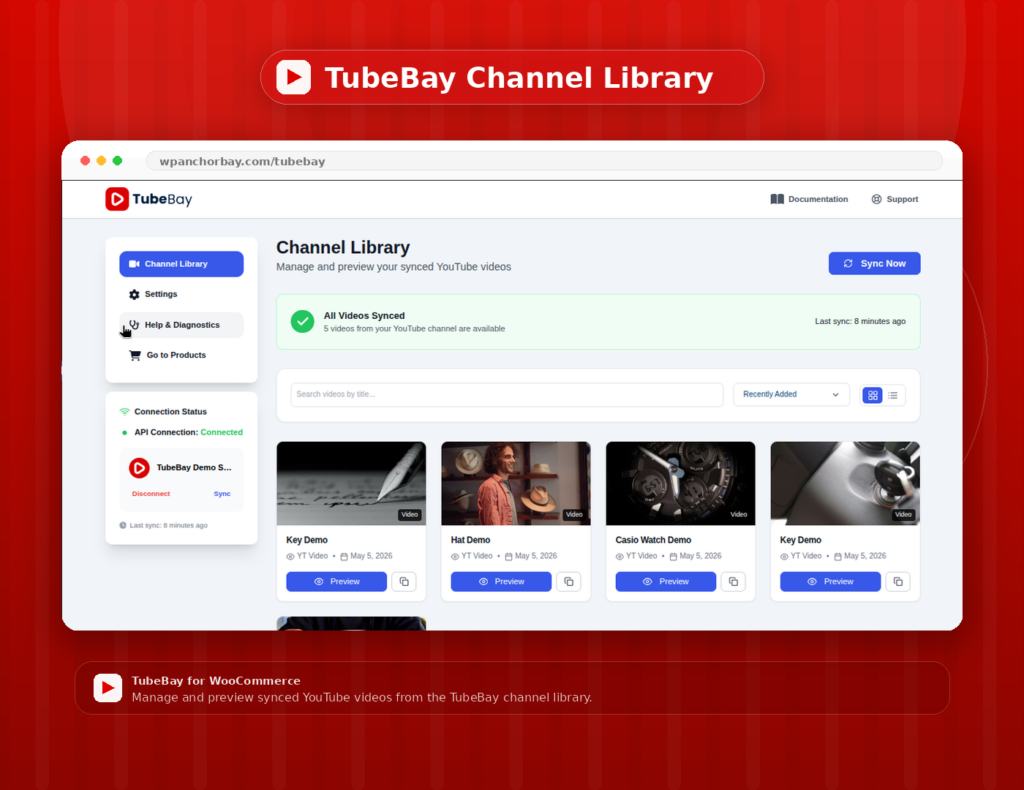
Once your channel is connected, TubeBay fetches your YouTube video library.
This gives you a browsable library inside WordPress. You can search and sort videos by:
- date
- title
- views
TubeBay also supports automatic daily sync through WP-Cron. That helps keep your video library updated over time.
This is one of the main reasons TubeBay works well for active WooCommerce stores.
TubeBay Tutorial Benefit Block
At this stage, TubeBay works like a WooCommerce YouTube video sync tool.
That means you can manage product video content from one place instead of handling videos one by one.
Step 5: Open a WooCommerce Product
Next, go to the product edit screen for any WooCommerce product.
TubeBay adds a custom metabox there. Inside that area, you can browse your synced videos and choose the one that fits the product.
This is where TubeBay becomes very practical. You manage product videos where you already manage the product itself.
For store owners, this saves time and reduces friction.
Step 6: Assign a Video to the Product
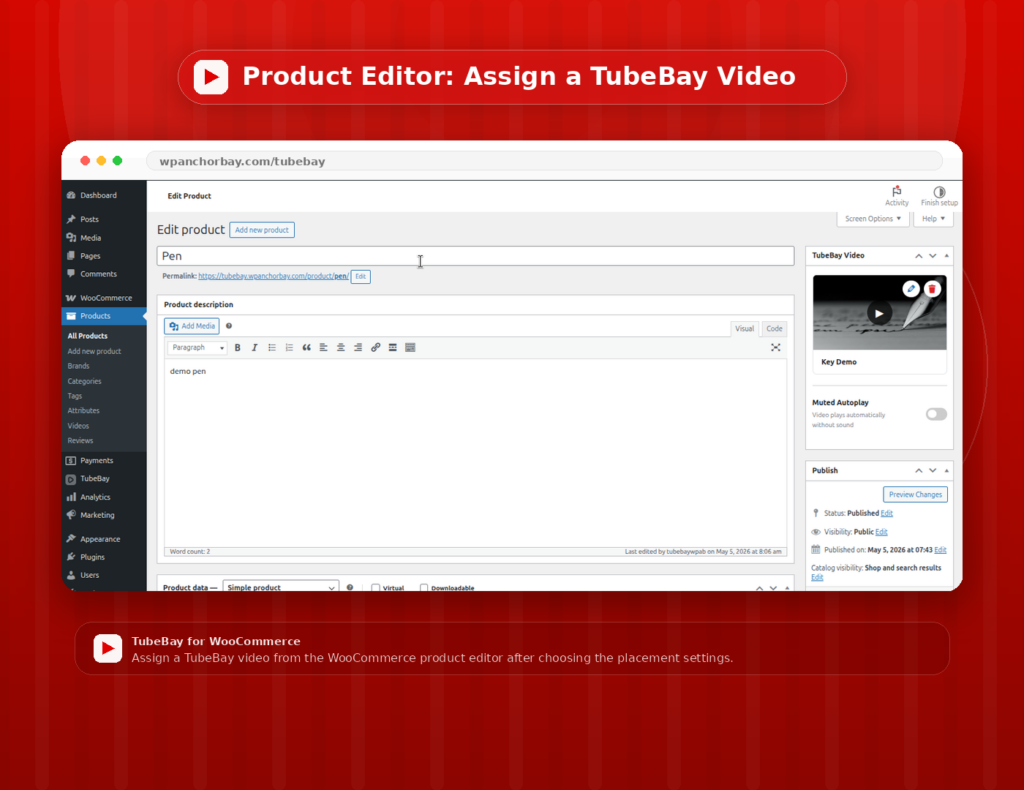
Choose the video you want to display for the product.
TubeBay lets you assign that video without touching embed code.
This is useful for:
- product demos
- how-to videos
- feature highlights
- unboxing clips
- comparison videos
Once selected, the video is linked to the product and prepared for frontend display.
Now your TubeBay setup starts to affect the actual product page.
TubeBay Tutorial Comparison: Static Product Images vs Product Videos
| Content Type | Main Strength |
|---|---|
| Static product images | Clean product presentation |
| WooCommerce product videos | Better product explanation and stronger engagement |
In many cases, the best approach is to use both.
That way, shoppers get both visual clarity and product context.
Step 7: Choose How the Video Appears
TubeBay supports native WooCommerce gallery integration.
Depending on your setup, the video can:
- replace the main product image
- appear inside the product gallery
- display in other configurable positions
This gives you flexibility based on how you want shoppers to experience the product page.
If your store depends on visuals, this step matters a lot.
So take a moment to choose the right layout.
TubeBay Tutorial Callout: Why Placement Matters
The way a WooCommerce product video appears can affect clicks, attention, and buyer confidence.
Choose a placement that supports the buying journey, not one that distracts from it.
Step 8: Review Playback Settings
TubeBay includes settings for autoplay and controls.
These settings can be managed globally or per product, depending on your use case.
Before publishing, review how you want the video experience to feel for visitors.
A simple and controlled experience often works best on product pages.
In other words, clean playback settings usually perform better.
Step 9: Preview the Product Page
Now visit the live product page and test the video.
You should see a lightweight video preview instead of a heavy YouTube player loading instantly.
When the visitor clicks play, the full YouTube player loads.
This setup helps protect page speed while still giving shoppers a rich product experience.
At this point, your TubeBay tutorial setup is almost complete.
What the Frontend Experience Should Feel Like
The product page should feel smooth, clear, and useful.
Visitors should see a clean video preview first. They should not feel like the page becomes heavy just because a YouTube video was added.
Step 10: Use the Shortcode If Needed
TubeBay also includes the shortcode.
You can use it to place a video in other parts of your site when needed.
That can help with:
- landing pages
- blog posts
- feature pages
- custom promotional sections
This gives TubeBay value beyond the standard WooCommerce product gallery.
For example, you can reuse videos across key marketing pages.
Why TubeBay Is Useful for WooCommerce Stores
TubeBay solves a real workflow problem.
Without a tool like this, store owners often need to copy YouTube embed code, manage placement by hand, and deal with slower page loads.
TubeBay simplifies that process.
It combines:
- easier video management
- YouTube channel syncing
- product-level video assignment
- stronger product presentation
- better frontend performance
That makes it useful for both growth and user experience.
It also makes TubeBay easier to scale as your video library grows.
TubeBay Tutorial Features That Matter Most During Setup
When setting up TubeBay, these features matter most:
- Google OAuth 2.0 connection
- YouTube channel sync
- WooCommerce gallery integration
- lightweight video facade
- autoplay and controls settings
- shortcode support
- daily sync support
Together, these features make TubeBay more than a basic WooCommerce video plugin.
They make it a more complete WooCommerce product video system.
Best Practices for TubeBay Setup
To get better results from TubeBay, follow these tips:
- use clear product demo videos
- match each video to the right product
- keep video titles organized in YouTube
- review product page layout before publishing
- test autoplay settings carefully
- use videos that support buying decisions
The goal is not just to add video.
The goal is to make the product page more useful.
Above all, keep the setup helpful for shoppers.
TubeBay Tutorial Callout: Best Use Cases for TubeBay
TubeBay works especially well for:
- product demo videos
- feature explanation videos
- comparison videos
- usage walkthroughs
- promotional product highlights
These use cases often lead to stronger engagement.
Common Mistakes to Avoid
Here are a few mistakes to avoid during setup:
- connecting the wrong YouTube account
- assigning unrelated videos to products
- ignoring frontend preview testing
- overusing autoplay
- adding video where static product imagery should stay primary
A clean balance usually works best.
If you avoid these mistakes, your TubeBay setup will work much better.
TubeBay Tutorial Comparison: Standard Video Embed vs TubeBay
| Option | Better For |
|---|---|
| Standard embed | quick one-off use |
| TubeBay | structured WooCommerce product video management |
For long-term use, TubeBay gives store owners a better workflow.
Final Thoughts
TubeBay gives WooCommerce store owners an easier way to bring YouTube videos into product pages.
It removes manual work, keeps setup inside WordPress, and helps improve product presentation without hurting performance.
If your store already uses YouTube content, TubeBay can turn that content into a stronger part of the buying journey.
If you want a cleaner way to set up product videos in WooCommerce, TubeBay is built for exactly that job.
That is why this TubeBay tutorial matters. It helps you move from scattered video embeds to a more organized WooCommerce product video workflow.